How To Clean Sea Urchins Video Tutorial
“How do you clean SEA URCHINS?” I was asked this question countless time last week...
Read More
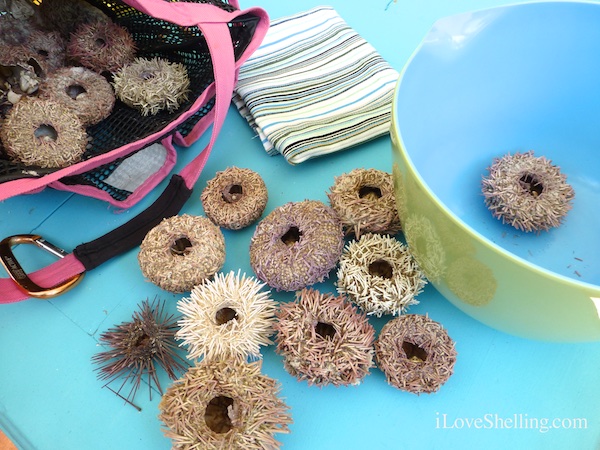
“How do you clean SEA URCHINS?” I was asked this question countless time last week...
Read More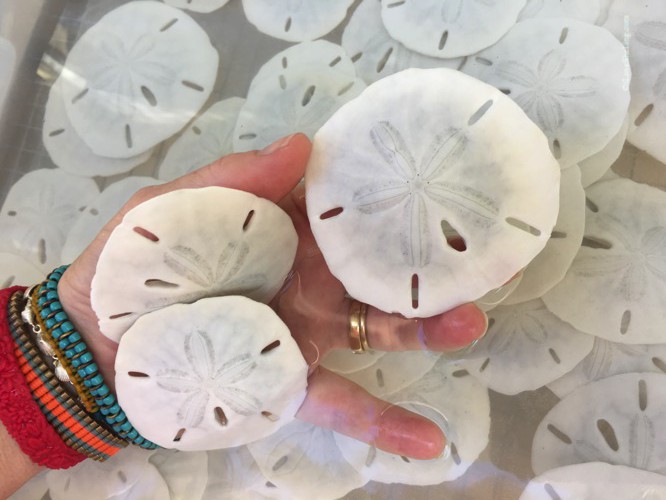
Finding SAND DOLLARS on the beach is always such a special treat. If you find dark...
Read More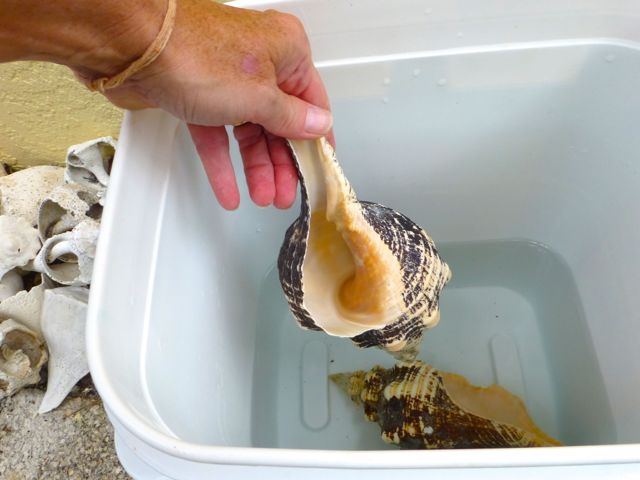
In the past few months, we’ve seen quite a few large HORSE CONCHS found around the Sanibel...
Read More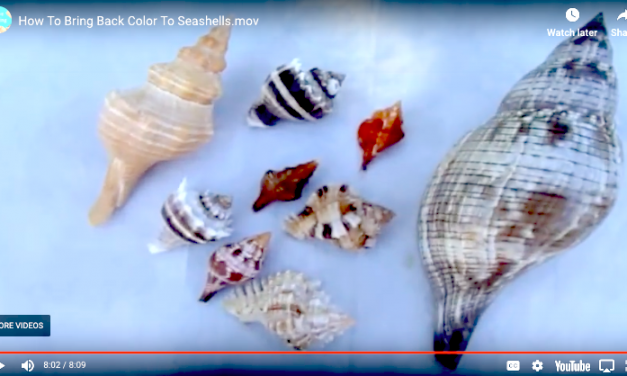
Example of a Kings Crown dipped in muriatic solution and a Kings Crown not dipped. I am...
Read More